Building a District Tile Server
I mentioned in my previous post about the Cloud-Native Geospatial Outreach Event that the topics presented really inspired me to investigate that space some more. I've worked on a few different mapping applications but they've leaned very heavily on either step-by-step instructions for gathering the necessary shape files and loading them into D3 or else use a platform solution like Mapbox to do most of the magic of making them nice-looking and performant.
The endorser map is nice in that it's self-contained and doesn't rely on an external third party service. But it has the downside of being quite heavy to load, and I had to aggressively simplify the district shapefiles to get it to the size that it currently is, which means that very small districts (such as those around Chicago or Dallas) are blocky, and hardly recognizable.

The Rural Impact map is nice looking and performant, and districts are accurate and detailed. But it relies on Mapbox's Studio to style, and for something like the district layer to be accurate you need to upload it as a dataset which means it's static, which is fine for districts but not for other types of dynamic data (like endorsers). And, of course, using Mapbox can incur a price depending on how often your map is loaded. I like Mapbox, and their pricing is very fair. Mapbox GLJS is a great library, and underpins other open-source mapping tools, but its license just changed so that it's no longer free, which sent a lot of people scrambling. I'd like to avoid a framework that's trending towards lock-in and, in any case, the whole point of this current exercise is to understand this space better.
So with this background I set out to see what it would be like to try to build my own tiling server. I heard a lot about tiling solutions such as TiTiler for Cloud Optimized GeoTIFFs at the Cloud-Native event, but I don't really have massive datasets, am not sure how to convert my data to COG files, and thought it would be good to start off with something simple and local, like my congressional district shapefile. On top of that, I've really wanted an excuse to play around with PostGIS, which is basically a "spatial database extender for PostgreSQL object-relational database." I've used PostgreSQL a lot in my day-to-day work as a developer. It's a fantastic database, and the idea you can add in spatial data and utilize that information right in line with your queries is amazing to me. I also recently listened to an interview about it on the Data Engineering Podcast that drove home just how useful of a tool it is in the geospatial world.
All of this led me to two great resources, this article by Crunchy Data outlining the basic concept of a tile server, and this amazing project by Development Seed, which is a FastAPI implementation of a tile server. What the article describes and what TiMVT provides is a Python server, backed by a PostGIS database, serving dynamic tiles via API endpoints which take calls for tile data in the form /tiles/{TileMatrixSetId}/{layer}/{z}/{x}/{y}.pbf. Once you have that ready libraries like Mapbox GL JS or Leaflet can layer your data onto their map and have it dynamically loaded and rendered just like you see with the Mapbox example above.
Before I dive into the whole process this is a working setup that I initially put together, and it worked exactly as advertised. As noted in the README file, this is really just the example application provided in the TiMVT project with a few tweaks for my own use case (like enabling CORS and updating the Leaflet page to refer to my district data).
Here is a live example.
Here's what it looked like being rendered in Leaflet without a base map, so that you just see the district shapes:
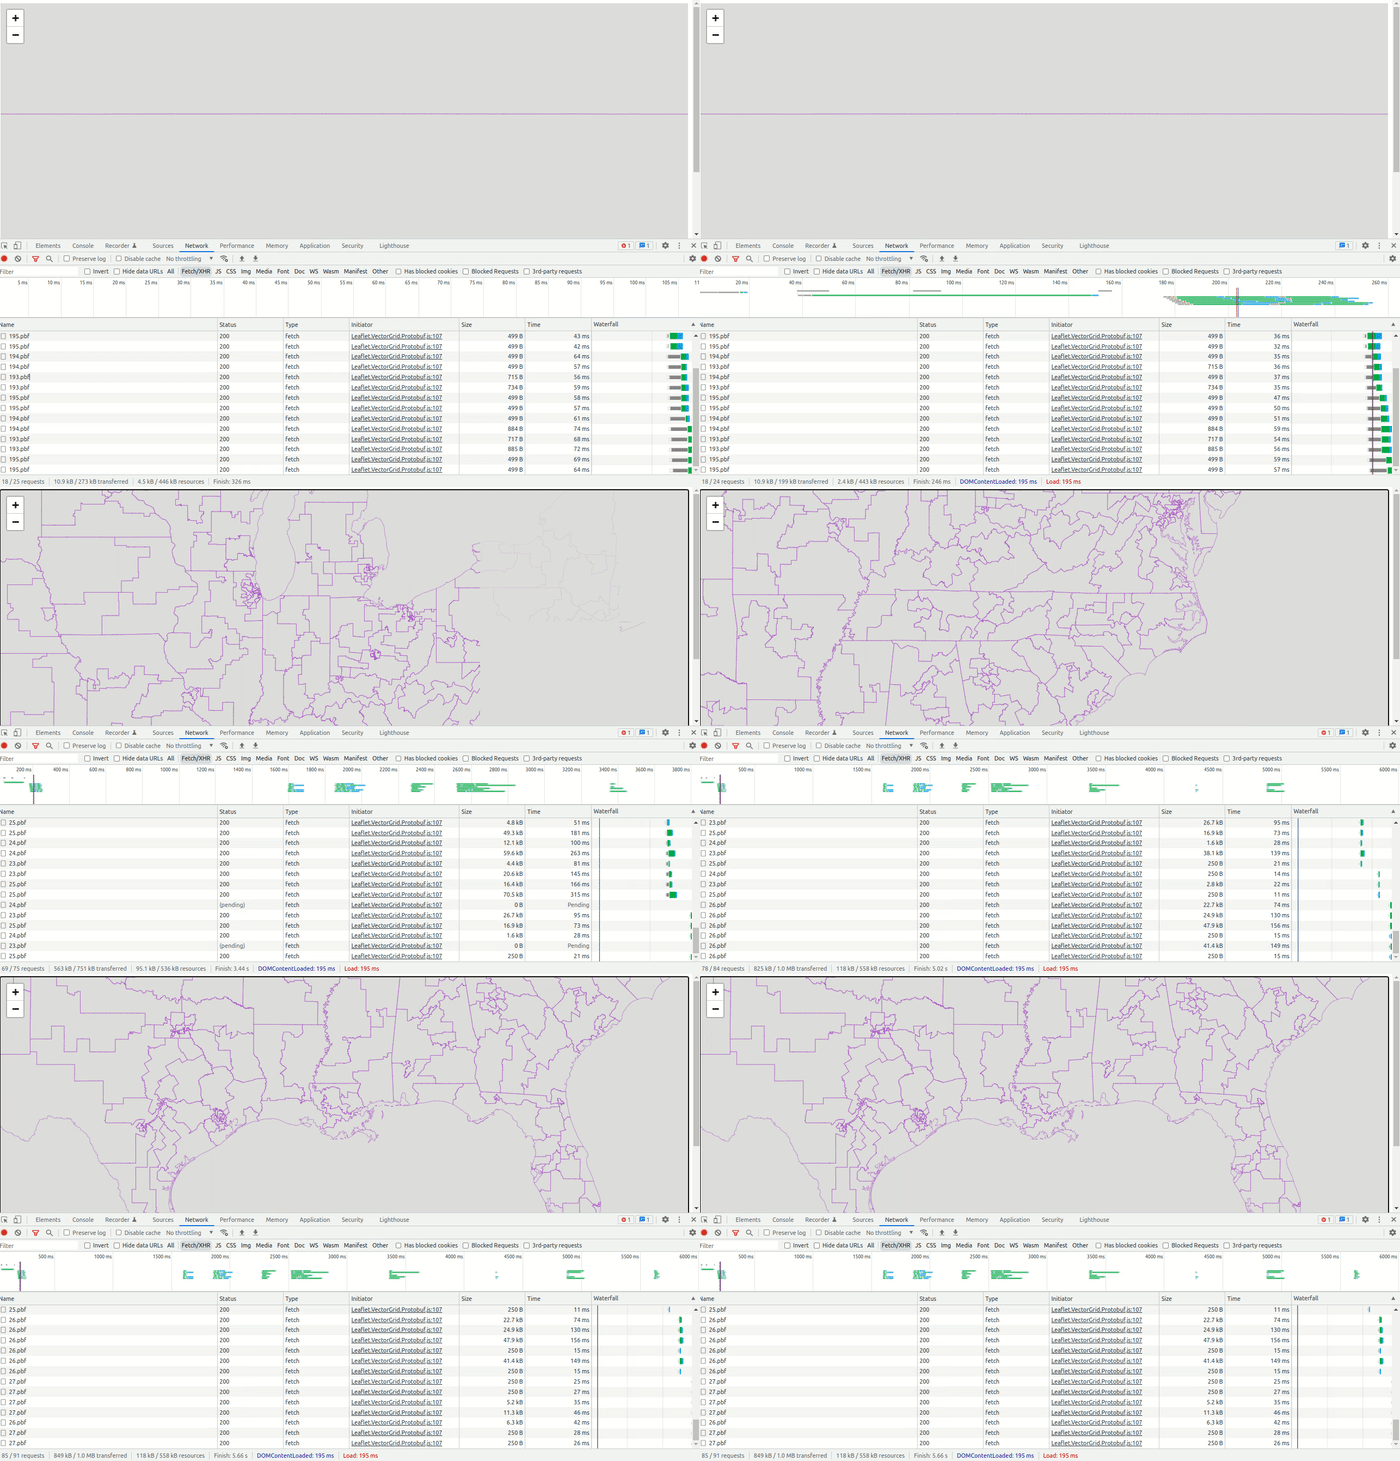
It's fun to look at the network panel as you zoom around and see the tiles being loaded. You can see the individual sets of calls that load each section of the map as it comes into view.
And here's the final product with a the same base map that I used for the Rural Impact application:
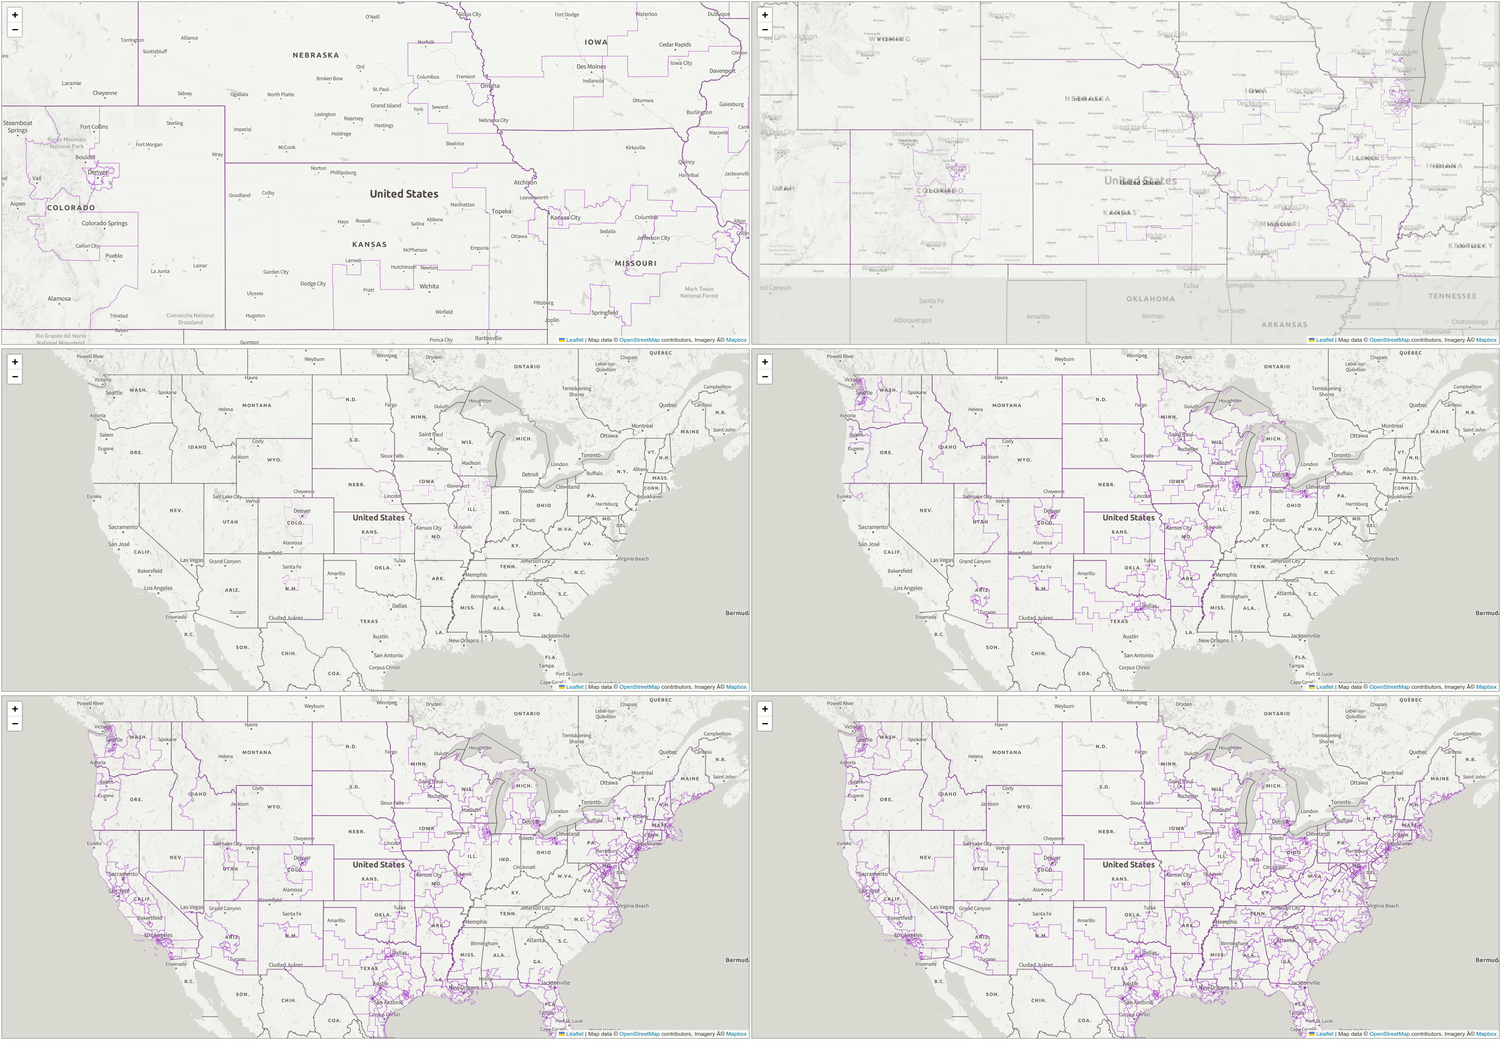
Getting to that final product was fairly involved, but I learned an awful lot.
Setting up PostGIS
Step one was getting PostGIS set up. I knew next to nothing about PostGIS, and had always thought of it as a separate product that must have Postgres backing it up. Actually it's just an extension of Postgres that you can enable with the command CREATE EXTENSION postgis;... that's it. Pretty incredible. I went through this excellent getting started series, which was mostly just a slide deck, but it was perfect, and gave me just the background I wanted. It used a census dataset for New York which provided a great illustration of what you can do when you have your spatial data right alongside your other data. I won't go into detail but just look at a couple of examples of very complex questions you can answer with a single query:
/* What is the population of the West Village? */
SELECT Sum(blk.opn_total)
FROM nyc_neighborhoods nh
  JOIN nyc_census_blocks blk
  ON nh.geom && blk.geom
WHERE nh.name = 'West Village';

/* What are all the neighborhoods served by the 6 train? */
SELECT DISTINCT n.name, n.boroname
FROM nyc_subway_stations AS s
  JOIN nyc_neighborhoods AS n
  ON ST_Contains(n.geom, s.geom)
WHERE strpos(s.routes,'6') > 0;
Given that PostGIS is just an extension for Postgres, getting it set up wasn't too bad. I used the official Docker image which is really all I needed.
Loading the Data
Loading the data was one of the trickier parts of this whole process. That was the case for my first D3 iteration of a district map as well. Long ago I managed to find a nice district shapefile on the census website, but I couldn't find that this time around. Instead I found a dataset in lpk format, which I'm unfamiliar with.
There are a dizzying number of shapefile formats. ogr2ogr, a command line tool to convert between different shapefile formats, can convert 5 different types just by itself, and it doesn't handle everything. The range of options is intimidating at first, and still sort of is. The format I'm most familiar with is GeoJSON, since that's a common format for doing things in the web.
Apparently lpk files are just archive files that you can unzip (sort of like docx files) and which, under the hood, are just layer and project files which common tools do understand. I was able to extract my district file, but I couldn't find the magic incantation for ogr2ogr that would convert it into a format that I could load into PostGIS. What ended up working was opening QGIS, starting a new project, clicking Layer -> Add Layer -> Add Vector Layer... and then selecting the "cd117.gdb" subfolder from the unzipped directory:
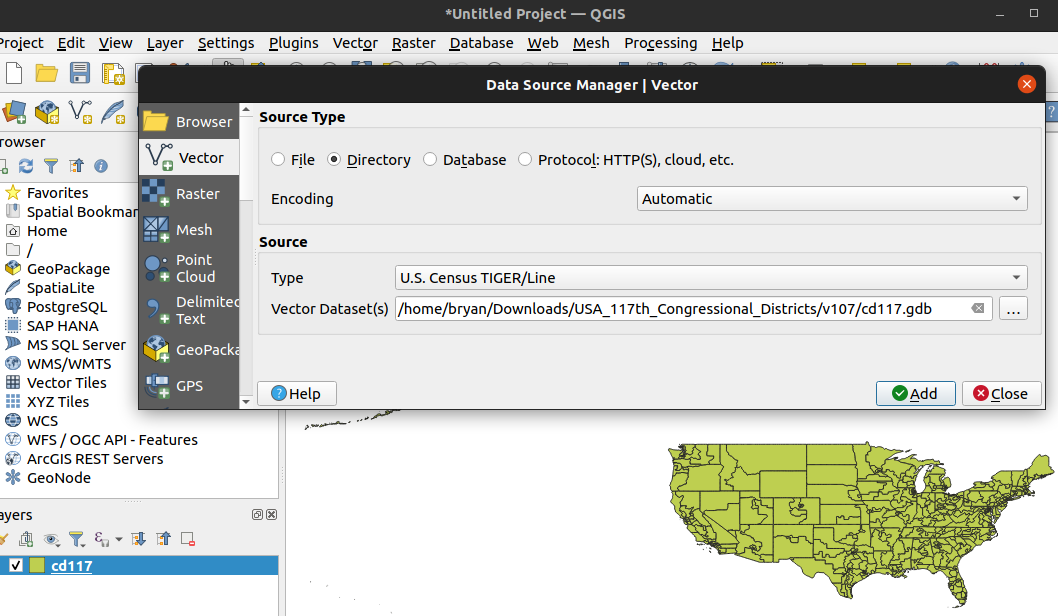
Once in QGIS the district data can be exported in any format that we like. We can also, at this point, do things like simplify the data. As a side note, simplifying the data is a good thing to do in this case since census data can be very finely-detailed with accuracy down to tens of meters. This is much more detail that we need for showing information on a map. Various algorithms exist to reduce the number of vertices in these vector layers and thus reduce the file size. I'm jumping ahead here, but after applying one of these algorithms the final GeoJSON file went from 35MB to 16MB with a barely-perceptible change in how the district lines look when zoomed in. Granted, the tiling process that we end up with does simplification on its own, but my untested assumption is that it's still good to weed out some points ahead of time.
We export the data by selecting the layer in the left sidebar and selecting Save As -> GeoJSON or SQL Dump. I picked GeoJSON because I thought it would be useful to have in case I wanted to use the entire layer (like for importing to Mapbox or using with D3.js). To import it I used the command ogr2ogr -f "PostgreSQL" PG:"dbname=[db_name] host=localhost user=[db_user] port=[db_port] password=[db_pwd]" "./cd117_export.geojson" -nln cd117 -append filling in the [] values as needed. A note here that -nln means "new layer name" and in the context of this import it's the postgres table that the data will be imported into.
This ran very quickly, and I could open up PgAdmin, connect to my database container, and see the new table. An interesting thing I noticed is that, normally you can actually view a small rendering of your geographical data right inside of PgAdmin, which is a great feature. But for this table it said that my geography was 3D, which it could not render. That surprised me, and I'm honestly not entirely sure whether elevation data is in these shapefiles and, if so, whether I can/should flatten that data since it seems unnecessary for what I'm doing.
Installing and Running TiMVT
Installing and running the tile server TiMVT was incredibly easy, and is outlined in my project. I think the only thing I stumbled on was forgetting that I put my PostGIS server on a different port. I also needed to add gunicorn and python-dotenv to installed requirements. Oh, and for about the hundredth time I was reminded that you shouldn't put an @ symbol in your database password in case it gets used in a database connection string of the form postgresql://[name]:[password]@[host]:[port]/[database_name]. It took me awhile to realize that my separate environmental variables were being combined into a connection string, so that, for example, the my@password@hostname was messing up the connection.
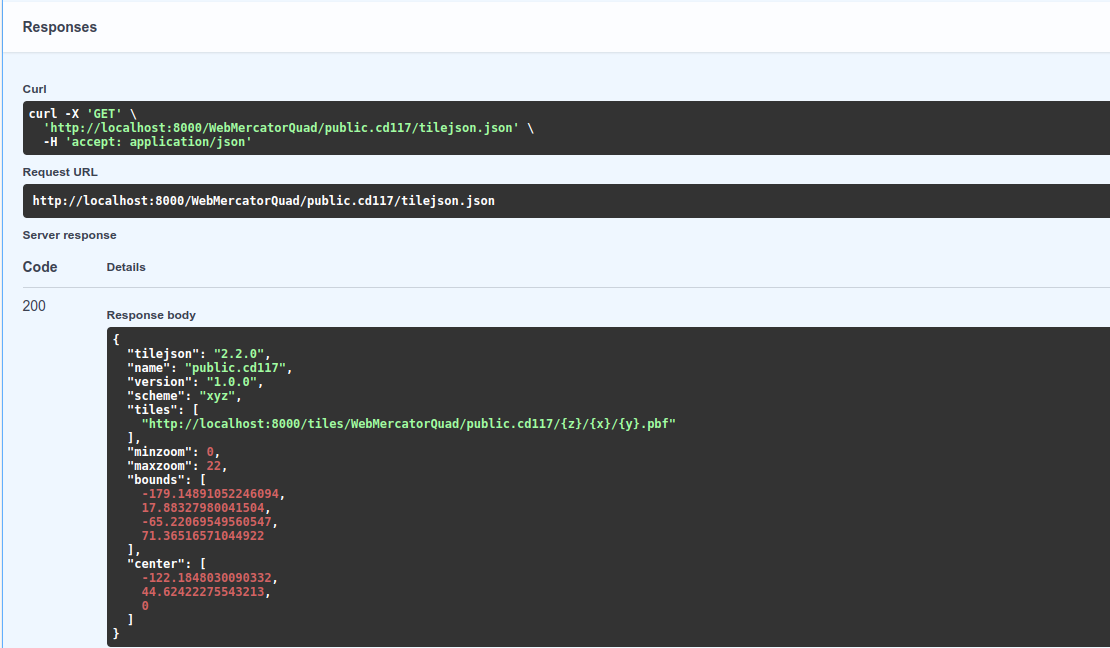
FastAPI, the Python server that TiMVT uses, is incredible. By default, and basically for free, you get Swagger documentation if you go to your_server_url/docs. That means I could fire up the server, go to the docs, and immediately see the available endpoints, and actually make example calls to them to pull available tables and tiles.
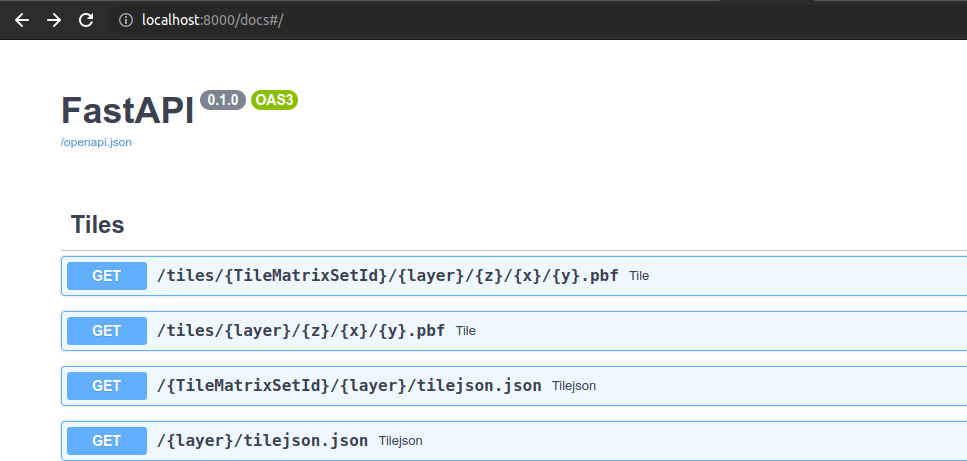
Updating the Example Leaflet Map
I really appreciate that the TiMVT includes demo front-end pages implemented in both Leaflet and Mapbox. It was mostly straightforward. I downloaded the demo files, filled in my Mapbox style information, and pointed the tile URL to my local server. There were a couple of tricky bits I had to work through, primarily due to my being very new to both Leaflet and GIS work.
First, I didn't really understand that the two Leaflet examples were not only demonstrating the use of Leaflet tiling, but were also showing how you could update your map to handle different map projections. It should have been obvious since the names of the web pages had numbers in them that coincided with different projections (e.g. index_3035.html = EPSG:3035). When the maps didn't work or, in one case, showed the congressional districts superimposed over most of the globe I spent a good while trying different things before realizing that I just needed to strip out all of the projection-related code in the example. Along with the imports of the proj4 libraries, this is what I needed to remove:
var EuropeanETRS89_LAEAQuad = new L.Proj.CRS(
	'EPSG:3035',
	'+proj=laea +lat_0=52 +lon_0=10 +x_0=4321000 +y_0=3210000 +ellps=GRS80 +towgs84=0,0,0,0,0,0,0 +units=m +no_defs', {
	resolutions: [ 8192.0, 4096.0, 2048.0, 1024.0, 512.0, 256.0 ],
});

// as well as the bit about adding that projection to the map
crs: EuropeanETRS89_LAEAQuad
Of course, as often happens when I'm frantically trying different things, I remember only belatedly that it's better to try one thing, see if it works, then back it out if it doesn't work. In this case I had gone about upgrading versions of Leaflet and Proj4 so that, when I finally made the connection about the setting of the projection being the issue, I had other variables in play. Either way though I got it figured out. The final bit was to realize that Web Mercator is the default projection for Leaflet, and that I needed to specify that in the URL to my local tiling server like this: http://localhost:8000/tiles/WebMercatorQuad/public.cd117/{z}/{x}/{y}.pbf.
Running my Leaflet App
As I was making all of these changes to troubleshoot the Leaflet setup I needed a way to actually serve the page to my browser. There are a lot of ways to do that, from setting up a little development Node.js server, to using something like Apache or Nginx, or even making the map a full blown React project or something like that.
In this case I used a really handy Python feature that works great for these situations. If you have a newer version of Python installed you can just type:
python -m SimpleHTTPServer <port_number>to have it launch a web server in whatever directory you're in. This is especially nice since I have other apps and processes running on my computer for port 80.
There you have it. That was a lot but it was a fun project and, as I said, I learned an awful lot. The tools out there these days are absolutely incredible and I have endless appreciation for groups like Development Seed for putting these libraries out there. The idea that you can make a dynamic tile server with more-or-less a pip install .. is hard to believe. Behind the scenes it's no less incredible what PostGIS is doing, enabling that behavior with its AsMVT ("as map vector tile") built-in function.
Now that I know how some of this works I can think of at least a dozen scenarios where it could be useful, and I like the idea that I don't necessarily have to set it up inside of a third party walled garden. Also, it's always a really gratifying experience to go through something like this and, at least to some extent, demystify a concept that seemed fairly intimidating before.